投稿者「hidekazuna」のアーカイブ

Installing OpenStack Octavia Stein release on Ubuntu 18.04 manually

This describes how to install and configure the OpenStack Load-balancer service(Octavia) on top of the Minimal deployment for Stein for Ubuntu. This is based on the octavia devstack plugin.

Note: I contributed Octavia installation guide to the community based on this article. Please visit Install and configure for Ubuntu!

Prerequites

Before you install and configure the service, you must create a database, service credentials, and API endpoints.

Create the database

mysql> CREATE DATABASE octavia;
mysql> CREATE USER ‘octavia’@’localhost’ IDENTIFIED BY 'password';
mysql> GRANT ALL PRIVILEGES ON octavia.* TO ‘octavia’@’localhost’;
mysql> GRANT ALL PRIVILEGES ON octavia.* TO 'octavia'@'%' IDENTIFIED BY 'password';
mysql>flush PRIVILEGES;

Create the octavia user

$ source admin-openrc.sh
$ openstack user create --domain default --password-prompt octavia
$ openstack role add --project service --user octavia admin

Create the service entry and endpoints

$ source admin-openrc.sh
$ openstack service create --name octavia --description "OpenStack Octavia" load-balancer
$ openstack endpoint create --region RegionOne octavia public http://<controller>:9876
$ openstack endpoint create --region RegionOne octavia internal http://<controller>:9876
$ openstack endpoint create --region RegionOne octavia admin http://<controller>:9876

Octavia deploys amphora based on a virtual machine disk image. you must create the disk image, upload the image to Glance and configure a Nova flavor to use for amphora.

Create the amphora image

$ git clone https://github.com/openstack/octavia.git
$ sudo apt update
$ sudo apt install tox qemu-utils git kpartx debootstrap
$ cd octavia/diskimage-create
$ tox -e build

Upload the amphora image

Create octavia-openrc.sh file.

export OS_PROJECT_DOMAIN_NAME=Default
export OS_USER_DOMAIN_NAME=Default
export OS_PROJECT_NAME=service
export OS_USERNAME=octavia
export OS_PASSWORD=<password>
export OS_AUTH_URL=http://<controller>:5000
export OS_IDENTITY_API_VERSION=3
export OS_IMAGE_API_VERSION=2
export OS_VOLUME_API_VERSION=3
$ source octavia-openrc.sh
$ openstack image create --disk-format qcow2 --container-format bare --public --tag amphora --file amphora-x64-haproxy.qcow2 amphora-x64-haproxy

Create a flavor for the amphora image

$ source octavia-openrc.sh
$ openstack flavor create --id 200 --vcpus 2 --ram 1024 --disk 10 "amphora" --public

Install and configure components

Install packages

$ sudo apt install octavia-api octavia-health-manager octavia-housekeeping octavia-worker python3-octavia python3-octaviaclient

If ocatavia-common package asks you to configure, choose No.

Create the certificates

$ sudo mkdir /etc/octavia/certs
$ sudo /home/ubuntu/octavia/bin/create_certificates.sh /etc/octavia/certs /home/ubuntu/octavia/etc/certificates/openssl.cnf

Create security groups

$ source octavia-openrc.sh
$ openstack security group create lb-mgmt-sec-grp
$ openstack security group rule create --protocol icmp lb-mgmt-sec-grp
$ openstack security group rule create --protocol tcp --dst-port 22 lb-mgmt-sec-grp
$ openstack security group rule create --protocol tcp --dst-port 9443 lb-mgmt-sec-grp
$ openstack security group create lb-health-mgr-sec-grp
$ openstack security group rule create --protocol udp --dst-port 5555 lb-health-mgr-sec-grp

Create a key pair for logining to the amphora instance

$ openstack keypair create --public-key ~/.ssh/id_rsa.pub mykey

Create a network

OCTAVIA_MGMT_SUBNET=172.16.0.0/12
OCTAVIA_MGMT_SUBNET_START=172.16.0.100
OCTAVIA_MGMT_SUBNET_END=172.16.31.254
OCTAVIA_MGMT_PORT_IP=172.16.0.2

openstack network create lb-mgmt-net
openstack subnet create --subnet-range $OCTAVIA_MGMT_SUBNET --allocation-pool start=$OCTAVIA_MGMT_SUBNET_START,end=$OCTAVIA_MGMT_SUBNET_END --network lb-mgmt-net lb-mgmt-subnet

SUBNET_ID=$(openstack subnet show lb-mgmt-subnet -f value -c id)
PORT_FIXED_IP="--fixed-ip subnet=$SUBNET_ID,ip-address=$OCTAVIA_MGMT_PORT_IP"

MGMT_PORT_ID=$(openstack port create --security-group lb-health-mgr-sec-grp --device-owner Octavia:health-mgr --host=$(hostname) -c id -f value --network lb-mgmt-net $PORT_FIXED_IP octavia-health-manager-listen-port)

MGMT_PORT_MAC=$(openstack port show -c mac_address -f value $MGMT_PORT_ID) 
MGMT_PORT_IP=$(openstack port show -f value -c fixed_ips $MGMT_PORT_ID | awk '{FS=",| "; gsub(",",""); gsub("'\''",""); for(i = 1; i <= NF; ++i) {if ($i ~ /^ip_address/) {n=index($i, "="); if (substr($i, n+1) ~ "\\.") print substr($i, n+1)}}}')

sudo ip link add o-hm0 type veth peer name o-bhm0
NETID=$(openstack network show lb-mgmt-net -c id -f value)
BRNAME=brq$(echo $NETID|cut -c 1-11)
sudo brctl addif $BRNAME o-bhm0
sudo ip link set o-bhm0 up
            
sudo ip link set dev o-hm0 address $MGMT_PORT_MAC
sudo iptables -I INPUT -i o-hm0 -p udp --dport 5555 -j ACCEPT
sudo dhclient -v o-hm0

Edit the /etc/octavia/octavia.conf file

[DEFAULT]
transport_url=rabbit://openstack:<password>@<controller>

[api_settings]
bind_host = 0.0.0.0
bind_port = 9876
 
[database]
connection = mysql+pymysql://octavia:<password>@<controller>/octavia

[health_manager]
event_streamer_driver = noop_event_streamer
heartbeat_key = insecure
controller_ip_port_list = 127.0.0.1:5555
bind_ip = 127.0.0.1
bind_port = 5555
 
[keystone_authtoken]
www_authenticate_uri = http://</controller><controller>:5000
auth_url = http://</controller><controller>:5000
username = octavia
password = <password>
project_name = service
project_domain_name = Default
user_domain_name = Default
auth_type = password

[certificates]
ca_certificate = /etc/octavia/certs/ca_01.pem
ca_private_key = /etc/octavia/certs/private/cakey.pem
ca_private_key_passphrase = foobar
 
[anchor]
[networking]
 
[haproxy_amphora]
bind_host = 0.0.0.0
bind_port = 9443
client_cert = /etc/octavia/certs/client.pem
server_ca = /etc/octavia/certs/ca_01.pem
base_path = /var/lib/octavia
base_cert_dir = /var/lib/octavia/certs
connection_max_retries = 1500
connection_retry_interval = 1
rest_request_conn_timeout = 10
rest_request_read_timeout = 120
 
[controller_worker]
amp_image_tag = amphora
amp_ssh_key_name = mykey
amp_secgroup_list = <lb -mgmt-sec-grp_id>
amp_boot_network_list = </lb><lb -mgmt-net_id>
amp_flavor_id = 200
network_driver = allowed_address_pairs_driver
compute_driver = compute_nova_driver
amphora_driver = amphora_haproxy_rest_driver
loadbalancer_topology = SINGLE
 
[task_flow]
 
[oslo_messaging]
rpc_thread_pool_size = 2
topic = octavia_prov
event_stream_transport_url = rabbit://openstack:<password>@<controller>
 
[house_keeping]
[amphora_agent]
[keepalived_vrrp]
 
[service_auth]
auth_url = http://</controller><controller>:5000
username = octavia
password = <password>
project_name = service
project_domain_name = Default
user_domain_name = Default
auth_type = password

Initialize the database

$ sudo octavia-db-manage upgrade head

Finalize installation

Restart the services:

$ sudo sytemctl restart octavia-api octavia-health-manager octavia-housekeeping octavia-worker 

Test deployment

Add load-balancer_member role to non admin user for creating lb etc.

You need to add load-balancer_member role if non admin user wants to use loadbalancer service.

$ openstack role create load-balancer_member
$ openstack role add --user <user_id> --project <project_id> <load-balancer_member_id>

Deploy a basic HTTP load balancer using a floating IP

This is based on Deploy a basic HTTP load balancer using a floating IP

Prerequisites

$ source demo-openrc.sh
$ openstack security group create web
$ openstack security group rule create --protocol tcp --dst-port 80 web

$ openstack server create --flavor small --image bionic --nic net-id=<demo-net_id> --security-group default --security-group web --key-name mykey backend1
$ openstack server create --flavor small --image bionic --nic net-id=<demo-net_id> --security-group default --security-group web --key-name mykey backend2
$ openstack floating ip create provider
$ openstack server add floating ip backend1 <floating ip>
$ openstack floating ip create provider
$ openstack server add floating ip backend2 <floating ip>

Login both backend1 and backend2 and install apache2.

These floating ips are just for installing apache2, not used for load balancing.

Deploy a load balancer

$ openstack loadbalancer create --name lb1 --vip-subnet-id <demo-net_name>
$ openstack loadbalancer show lb1
$ openstack loadbalancer listener create --name listener1 --protocol HTTP --protocol-port 80 lb1
$ openstack loadbalancer pool create --name pool1 --lb-algorithm ROUND_ROBIN --listener listener1 --protocol HTTP
$ openstack loadbalancer healthmonitor create --delay 5 --max-retries 4 --timeout 10 --type HTTP --url-path / pool1
$ openstack loadbalancer member create --subnet-id selfservice --address <backend1>  --protocol-port 80 pool1
$ openstack loadbalancer member create --subnet-id selfservice --address <backend2> --protocol-port 80 pool1
$ openstack floating ip create provider
$ openstack floating ip set --port <load_balancer_vip_port_id> <floating_ip_id>
# load_balancer_vip_port_id is vip_port_id in the output of loadbalancer show lb1
$ curl http://<floating ip>
Prometheusを動かしてみる

自宅の環境にPrometheusを導入してみたくなり、まずは使ってみることにしました。

前提

この記事は以下のバージョンを前提にしています。

  • Ubuntu 18.04.2 LTS
  • Prometheus 2.8.0
  • Node Exporter 0.17.0

Prometheusインストール・起動

PrometheusはGoで開発されているので、バイナリと設定ファイルがまとまったtar ballをダウンロードし、設定を修正後にバイナリを実行すればよいです。

ubuntu@prom:~$ wget https://github.com/prometheus/prometheus/releases/download/v2.8.0/prometheus-2.8.0.linux-amd64.tar.gz
ubuntu@prom:~$ tar -xzf prometheus-2.8.0.linux-amd64.tar.gz
ubuntu@prom:~$ cd prometheus-2.8.0.linux-amd64
ubuntu@prom:~/prometheus-2.8.0.linux-amd64$ ls -l
total 103492
-rw-r--r-- 1 ubuntu ubuntu    11357 Mar 12 09:01 LICENSE
-rw-r--r-- 1 ubuntu ubuntu     2770 Mar 12 09:01 NOTICE
drwxr-xr-x 2 ubuntu ubuntu     4096 Mar 12 09:01 console_libraries
drwxr-xr-x 2 ubuntu ubuntu     4096 Mar 12 09:01 consoles
-rwxr-xr-x 1 ubuntu ubuntu 65272078 Mar 12 07:48 prometheus
-rw-r--r-- 1 ubuntu ubuntu      926 Mar 12 09:01 prometheus.yml
-rwxr-xr-x 1 ubuntu ubuntu 40669742 Mar 12 07:49 promtool
ubuntu@prom:~/prometheus-2.8.0.linux-amd64$ 
ubuntu@prom:~/prometheus-2.8.0.linux-amd64$ ./prometheus 
level=info ts=2019-03-23T04:55:54.749581666Z caller=main.go:285 msg="no time or size retention was set so using the default time retention" duration=15d
level=info ts=2019-03-23T04:55:54.749670041Z caller=main.go:321 msg="Starting Prometheus" version="(version=2.8.0, branch=HEAD, revision=59369491cfdfe8dcb325723d6d28a837887a07b9)"
level=info ts=2019-03-23T04:55:54.749700665Z caller=main.go:322 build_context="(go=go1.11.5, user=root@4c4d5c29b71f, date=20190312-07:46:58)"
level=info ts=2019-03-23T04:55:54.74972578Z caller=main.go:323 host_details="(Linux 4.15.0-46-generic #49-Ubuntu SMP Wed Feb 6 09:33:07 UTC 2019 x86_64 prom (none))"
level=info ts=2019-03-23T04:55:54.749750667Z caller=main.go:324 fd_limits="(soft=1024, hard=1048576)"
level=info ts=2019-03-23T04:55:54.749773265Z caller=main.go:325 vm_limits="(soft=unlimited, hard=unlimited)"
level=info ts=2019-03-23T04:55:54.751990415Z caller=main.go:640 msg="Starting TSDB ..."
level=info ts=2019-03-23T04:55:54.754091703Z caller=web.go:418 component=web msg="Start listening for connections" address=0.0.0.0:9090
level=info ts=2019-03-23T04:55:54.756149846Z caller=main.go:655 msg="TSDB started"
level=info ts=2019-03-23T04:55:54.756182656Z caller=main.go:724 msg="Loading configuration file" filename=prometheus.yml
level=info ts=2019-03-23T04:55:54.756896788Z caller=main.go:751 msg="Completed loading of configuration file" filename=prometheus.yml
level=info ts=2019-03-23T04:55:54.756915881Z caller=main.go:609 msg="Server is ready to receive web requests."

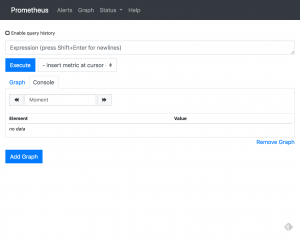
http://ipaddress:9090 を開くと /graphにリダイレクトし expression browerが表示される。ここから PromQLによるクエリを実行できる。

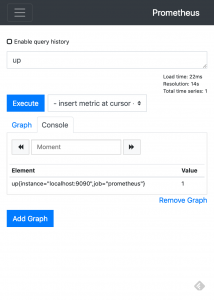
入力フィールドにupを入力し、ExecuteをクリックするとConsoleに
up{instance=”localhost:9090″,job=”prometheus”}の値が1と表示されます。これはprometheus jobのlocalhost:9090 targetのスクレイピングが成功したことを示します。prometheus jobは prometheus自体のmetricです。

これはデフォルトでprometheus.ymlに以下が書かれているためです。

scrape_configs:
  # The job name is added as a label `job=<job_name>` to any timeseries scraped from this config.
  - job_name: 'prometheus'

    # metrics_path defaults to '/metrics'
    # scheme defaults to 'http'.

    static_configs:
    - targets: ['localhost:9090']

Node Exporterのインストール・起動

Prometheusはソフトウェアごとに”Exporter”を動かし、HTTP GETで/metricsからメトリックを取得します。当然Exporterごとにポート番号は異なります。

Exporterにはofficialとそうでないものがあります。Prometheus GitHub organizationにあるものがofficialです。
officialでないもの含めThird-party exportersに一覧が、デフォルトポート番号の一覧はexporter default port wiki pageにあります。

ここではPrometheusを動かしたマシンにマシンメトリックを取得するNode Exporterをインストールします。Node ExporterもPrometheusと同様にバイナリと設定ファイルがまとまったtar ballをダウンロードし、設定を修正後にバイナリを実行すればよいです。

ubuntu@prom:~$ wget https://github.com/prometheus/node_exporter/releases/download/v0.17.0/node_exporter-0.17.0.linux-amd64.tar.gz
$ ubuntu@prom:~$ tar -xvf node_exporter-0.17.0.linux-amd64.tar.gz
$ cd node_exporter-0.17.0.linux-amd64 
ubuntu@prom:~/node_exporter-0.17.0.linux-amd64$ ./node_exporter 
INFO[0000] Starting node_exporter (version=0.17.0, branch=HEAD, revision=f6f6194a436b9a63d0439abc585c76b19a206b21)  source="node_exporter.go:82"
INFO[0000] Build context (go=go1.11.2, user=root@322511e06ced, date=20181130-15:51:33)  source="node_exporter.go:83"
INFO[0000] Enabled collectors:                           source="node_exporter.go:90"
INFO[0000]  - arp                                        source="node_exporter.go:97"
INFO[0000]  - bcache                                     source="node_exporter.go:97"
INFO[0000]  - bonding                                    source="node_exporter.go:97"
INFO[0000]  - conntrack                                  source="node_exporter.go:97"
INFO[0000]  - cpu                                        source="node_exporter.go:97"
INFO[0000]  - diskstats                                  source="node_exporter.go:97"
INFO[0000]  - edac                                       source="node_exporter.go:97"
INFO[0000]  - entropy                                    source="node_exporter.go:97"
INFO[0000]  - filefd                                     source="node_exporter.go:97"
INFO[0000]  - filesystem                                 source="node_exporter.go:97"
INFO[0000]  - hwmon                                      source="node_exporter.go:97"
INFO[0000]  - infiniband                                 source="node_exporter.go:97"
INFO[0000]  - ipvs                                       source="node_exporter.go:97"
INFO[0000]  - loadavg                                    source="node_exporter.go:97"
INFO[0000]  - mdadm                                      source="node_exporter.go:97"
INFO[0000]  - meminfo                                    source="node_exporter.go:97"
INFO[0000]  - netclass                                   source="node_exporter.go:97"
INFO[0000]  - netdev                                     source="node_exporter.go:97"
INFO[0000]  - netstat                                    source="node_exporter.go:97"
INFO[0000]  - nfs                                        source="node_exporter.go:97"
INFO[0000]  - nfsd                                       source="node_exporter.go:97"
INFO[0000]  - sockstat                                   source="node_exporter.go:97"
INFO[0000]  - stat                                       source="node_exporter.go:97"
INFO[0000]  - textfile                                   source="node_exporter.go:97"
INFO[0000]  - time                                       source="node_exporter.go:97"
INFO[0000]  - timex                                      source="node_exporter.go:97"
INFO[0000]  - uname                                      source="node_exporter.go:97"
INFO[0000]  - vmstat                                     source="node_exporter.go:97"
INFO[0000]  - xfs                                        source="node_exporter.go:97"
INFO[0000]  - zfs                                        source="node_exporter.go:97"
INFO[0000] Listening on :9100                            source="node_exporter.go:111"

http://ipaddress:9100 にアクセスするとNode Exporter文字列が表示されます。

http://ipaddress:9100/metricsからメトリックが取得できます。

ubuntu@prom:~$ curl http://ipaddress:9100/metrics                                                                       
# HELP go_gc_duration_seconds A summary of the GC invocation durations.                                                  
# TYPE go_gc_duration_seconds summary                                                                                    
go_gc_duration_seconds{quantile="0"} 1.4264e-05                                                                          
go_gc_duration_seconds{quantile="0.25"} 3.9649e-05                                                                       
go_gc_duration_seconds{quantile="0.5"} 9.7112e-05                                                                        
go_gc_duration_seconds{quantile="0.75"} 0.000147184                                                                      
go_gc_duration_seconds{quantile="1"} 0.003614629                                                                         
go_gc_duration_seconds_sum 0.062631656                                                                                   
go_gc_duration_seconds_count 896                                                                                         
# HELP go_goroutines Number of goroutines that currently exist.                                                          
# TYPE go_goroutines gauge                                                                                               
go_goroutines 8
(以下省略)

PrometheusからNode Exporterをモニタする

PrometheusでExporterで公開したメトリックを取得するには、prometheus.ymlを修正し、Prometheusを再起動またはSIGHUPシグナルを送ります。job名はなんでもよいが、ここではnodeとしました。

scrape_configs:
  # The job name is added as a label `job=<job_name>` to any timeseries scraped from this config.
  - job_name: 'prometheus'

    # metrics_path defaults to '/metrics'
    # scheme defaults to 'http'.

    static_configs:
    - targets: ['localhost:9090']

  - job_name: 'node'
    static_configs:
    - targets: ['localhost:9100']

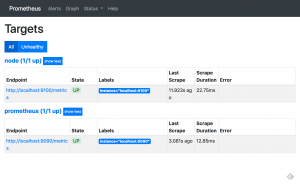
再起動後、Expression browserからStatus→Targetsをクリックすると、2つのTargetが表示され、両方のStateがUPになっています。

使ってみる

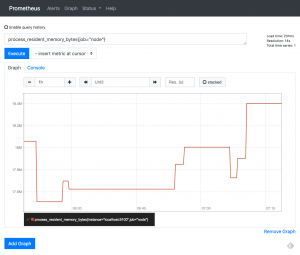
ここではNode exporter自体のメモリ使用量をグラフ表示してみます。
metricとしてprocess_resident_memory_bytes、label matcherとして job=”node”を指定します。

それっぽいグラフが表示されました。

Ubuntu 18.04にdnsmasqでローカルDNSをたてた

自宅のOpenStack用に、Ubuntu 18.04上にdnsmasqでローカルDNSをたてました。

自宅のOpenStackはコミュニティのインストールガイドにほぼ従っているので、コントローラとコンピュートの名前解決は/etc/hostsに書いています。インスタンスをたてて使っている分には問題なかったのですが、インスタンスの上でKubernetesクラスタを動かすとよろしくありません。KubernetesのPodはdnsPolicyがClusterFirstである場合、kube-dnsで解決出来ない名前解決は動いているノードに設定されているDNSサーバで名前解決します。そのため/etc/hostsではPodが名前解決できませんのでDNSサーバを建てることにしました。

dnsmasqはホストにある/etc/hostsをそのまま名前解決に使い、/etc/hostsにないものはホストのDNSサーバに問い合わせます。すでにControllerには/etc/hostsを書いているので、これを使います。

Controllerにdnsmasqをインストールします。

sudo apt install dnsmasq

dnsmasqの設定ファイルを修正します。

# Never forward plain names (without a dot or domain part)
domain-needed
# Never forward addresses in the non-routed address spaces.
bogus-priv
# Add local-only domains here, queries in these domains are answered
# from /etc/hosts or DHCP only.
local=/hidekazuna.localdomain/
# Set this (and domain: see below) if you want to have a domain
# automatically added to simple names in a hosts-file.
expand-hosts
# Set the domain for dnsmasq. this is optional, but if it is set, it
# does the following things.
# 1) Allows DHCP hosts to have fully qualified domain names, as long
#     as the domain part matches this setting.
# 2) Sets the "domain" DHCP option thereby potentially setting the
#    domain of all systems configured by DHCP
# 3) Provides the domain part for "expand-hosts"
domain=hidekazuna.localdomain

/etc/hostsを修正します。

# controller
10.0.0.11  controller.localdomain controller
# compute1
10.0.0.31  compute1.localdomain compute1
# compute2
10.0.0.32  compute2.localdomain compute2

dnsmasqを再起動します。

sudo systemctl restart dnsmasq

systemd-resolvedを再起動します。

sudo systemctl restart systemd-resolved

上記でうまくいかないときは、/etc/netplan/下に作成したネットワークの設定ファイルであるYAML形式のファイルから以下2つのファイルが生成されていることを確認します。1つ目のファイル名はインタフェース名により異なります。

  • /run/systemd/network/10-netplan-eno1.network
  • /run/systemd/resolve/resolv.conf

よくわからず自信がない場合は生成して適用後(systemd-networkdは再起動不要のようですが)systemd-networkd、systemd-resolved、dnsmasqを再起動します。

sudo netplan generate
sudo netplan apply
sudo systemctl restart systemd-networkd
sudo systemctl restart systemd-resolved
sudo systemctl restart dnsmasq

最後に名前解決できることを確認します。

$ dig controller

; <<>> DiG 9.11.3-1ubuntu1-Ubuntu <<>> controller
;; global options: +cmd
;; Got answer:
;; ->>HEADER<<- opcode: QUERY, status: NOERROR, id: 39671
;; flags: qr rd ra; QUERY: 1, ANSWER: 1, AUTHORITY: 0, ADDITIONAL: 1

;; OPT PSEUDOSECTION:
; EDNS: version: 0, flags:; udp: 65494
;; QUESTION SECTION:
;controller.			IN	A

;; ANSWER SECTION:
controller.		0	IN	A	10.0.0.11

;; Query time: 0 msec
;; SERVER: 127.0.0.53#53(127.0.0.53)
;; WHEN: Sun Jan 27 21:25:33 JST 2019
;; MSG SIZE  rcvd: 55
$ dig www.google.com

; <<>> DiG 9.11.3-1ubuntu1-Ubuntu <<>> www.google.com
;; global options: +cmd
;; Got answer:
;; ->>HEADER<<- opcode: QUERY, status: NOERROR, id: 27197
;; flags: qr rd ra; QUERY: 1, ANSWER: 1, AUTHORITY: 0, ADDITIONAL: 1

;; OPT PSEUDOSECTION:
; EDNS: version: 0, flags:; udp: 65494
;; QUESTION SECTION:
;www.google.com.			IN	A

;; ANSWER SECTION:
www.google.com.		219	IN	A	172.217.161.36

;; Query time: 8 msec
;; SERVER: 127.0.0.53#53(127.0.0.53)
;; WHEN: Sun Jan 27 21:27:13 JST 2019
;; MSG SIZE  rcvd: 59

ControllerにDNSサーバをたてたので、Computeから使うように設定変更します。Computeの設定は/etc/netplan/下にあるネットワーク設定ファイルのDNSサーバの値を変更したあと、2つのファイルを生成、適用してsystemd-resolvedを再起動します。

sudo netplan generate
sudo netplan apply
sudo systemctl restart systemd-resolved

名前解決できることを確認します。(下記はcompute2での実施例)

$ dig compute2

; <<>> DiG 9.11.3-1ubuntu1-Ubuntu <<>> compute2
;; global options: +cmd
;; Got answer:
;; ->>HEADER<<- opcode: QUERY, status: NOERROR, id: 24121
;; flags: qr rd ra; QUERY: 1, ANSWER: 1, AUTHORITY: 0, ADDITIONAL: 1

;; OPT PSEUDOSECTION:
; EDNS: version: 0, flags:; udp: 65494
;; QUESTION SECTION:
;compute2.			IN	A

;; ANSWER SECTION:
compute2.		0	IN	A	10.0.0.32

;; Query time: 0 msec
;; SERVER: 127.0.0.53#53(127.0.0.53)
;; WHEN: Sun Jan 27 21:43:08 JST 2019
;; MSG SIZE  rcvd: 53

$ dig www.google.com

; <<>> DiG 9.11.3-1ubuntu1-Ubuntu <<>> www.google.com
;; global options: +cmd
;; Got answer:
;; ->>HEADER<<- opcode: QUERY, status: NOERROR, id: 914
;; flags: qr rd ra; QUERY: 1, ANSWER: 1, AUTHORITY: 0, ADDITIONAL: 1

;; OPT PSEUDOSECTION:
; EDNS: version: 0, flags:; udp: 65494
;; QUESTION SECTION:
;www.google.com.			IN	A

;; ANSWER SECTION:
www.google.com.		219	IN	A	216.58.197.4

;; Query time: 6 msec
;; SERVER: 127.0.0.53#53(127.0.0.53)
;; WHEN: Sun Jan 27 21:43:10 JST 2019
;; MSG SIZE  rcvd: 59

hidekazu@compute2:~$

Certified Kubernetes Administrator (CKA) を取得しました

サイバーマンデーで試験とトレーニングがセットで179ドルだったのを利用して、1月6日にCertified Kubernetes Administrator (CKA) に合格できましたので、振り返っておきます。12月22日に1度受験して3%足りずに落ち、2回目で合格しました。1回再受験は無料でよかった!

試験概要

Candidate HandbookExam Tipsに書いてあります。自分の時はCandidate HandbookはVersion 1.15、Exam TipsはUpdated December, 2018でした。

方法 オンライン
時間 3時間
形式 パフォーマンスベース(コマンドを実行して課題を解決する)
問題数 24問
言語 問題文は英語、スペイン語、ポルトガル語、日本語、ドイツ語、中国語。試験官とのやりとり、ターミナルは英語のみ。(Handbook)
再受験 Cloud Native Computing Foundationから直接購入した場合、購入から12ヶ月の間に1回無料(Handbook)

試験環境

オンラインってどうやってやるの?と思いましたが、試験官とチャットして、画面共有して進めます。私の場合、最初にウェブカメラでパスポートを見せて、机の上を一通り、そのあと部屋をぐるっとカメラで写しました。
なお、自分はPCはMacBook、部屋は1DKのキッチン、机は無印良品の無垢材テーブルでした。MacBookの字が小さくて辛かった。。

勉強方法

仕事でKubernetes環境を管理していないので、体に馴染ませるためKubernetes完全ガイドのKubernetesの部分にある全てのコマンドを打ちました。この本は教科書的に網羅していて飽きてくるので、並行してDocker/Kubernetes 実践コンテナ開発入門を読みました。
また、前後してKubernetes The Hard Wayを2回やりました。1回目はただコピー、2回目は意味を考えながら(特に証明書関連)実行しました。
あと、試験準備に該当するかは微妙ですが、10月、11月には仕事で数件Kubernetesコミュニティに貢献しています。また、Raspberry Piにkubernetesクラスタをインストールして遊んでみたりしました。
購入したトレーニングは購入時点で大体準備を終えていたのでやりませんでした。

直前の準備

Candidate HandbookExam Tipsを読み直しました。Exam TipsをよくよくみたらKubernetesのバージョンが1.12、問題は3ヶ月ごとに更新を予定していると書いてありました。

試験はhttps://kubernetes.io/docs/​ とそのサブドメイン、https://kubernetes.io/blog​/​
を参照して良いことになっています。1回目はmanifestを全て手で書いていて時間が足らなかったので、コピーできるmanifestがどこにあるか、そこへたどり着く検索ワードを確認しておきました。

感想

3時間ずっとMacBookの画面をみてコマンドを打ち続けるのは思ったより大変でした。顔がカメラから外れてもいけないし、なんせ文字が小さい。
問題自体は基本的な知識を試す良い試験だと思いました。再受験1回無料なので、1回目で知識のあなを認識して再学習し、2回目で合格する自分のようなやり方もありだと思います。

JapanContainerDays v18.12 のスライドたち

追記: 公式はJapanContainerDays v18.12 公式資料まとめです。

12/4、5に聞きに行ったJapanContainerDays v18.12 のスライド一覧です。twitterから拾いました。なので全てじゃないですし、見落としがあるかもしれません。報告を書くのにスライド探してたらいつの間にか一覧作成に熱中してしまった。

4th

  • Microservices Platform on Kubernetes at Mercari
    • https://speakerdeck.com/tcnksm/microservices-platform-on-kubernetes-at-mercari
  • Kubernetesによる機械学習基盤への挑戦
    • https://www.slideshare.net/pfi/kubernetes-125013757
  • LINE Engineerを支える CaaS基盤の今とこれから
    • https://www.slideshare.net/linecorp/line-engineer-caas
  • Cloud Nativeの未来とIBMの取組み
    • https://www.slideshare.net/capsmalt/jkdv1812keynoteibmcapsmalt
  • ZOZOTOWNリプレイスにおけるKubernetes活用
    • https://speakerdeck.com/tsurumi/zozotown-replace-kubernetes
  • コンテナネットワーキング(CNI)最前線
    • https://www.slideshare.net/motonorishindo/cni-124981353
  • IBM Kubernetesの全貌と始め方
    • https://speakerdeck.com/takara9/ibm-kubernetesfalsequan-mao-toshi-mefang
  • Kubernetes ネットワーキングのすべて
    • https://www.slideshare.net/linecorp/kubernetes-124878915
  • 1年間の本番運用でわかったコンテナがチーム開発にもたらしてくれたもの
    • https://speakerdeck.com/shoichiron/container-brought-to-team-development
  • Kubernetes がもたらす 分散システムの脅威との戦い
    • https://speakerdeck.com/koudaiii/v18-dot-12-number-containerdaysjp
  • 本番環境のKubernetesマニフェストに 最低限必要な 7 のこと
    • https://speakerdeck.com/masayaaoyama/jkd1812-prd-manifests
  • レガシーシステムのコンテナ化に挑戦した話
    • https://speakerdeck.com/wappy100/legacy-to-container
  • ミドルウェア〜Webアプリまで全てをHelm化したサービスの運用事例
    • https://speakerdeck.com/chokkoyamada/midoruuea-webapurimadequan-tewohelmhua-sitasabisufalseyun-yong-shi-li
  • 40 topics of Kubernetes
    • https://www.slideshare.net/tyoshio2002/japan-container-day-2018
  • 1人でできる
    Docker Kubernetes(GKE)を
    使った新規サービス立ち上げ

    • https://speakerdeck.com/spring_mt/docker-and-kubernetes-gke-for-new-services
  • 初心者がk8sでWPを運用するまでの学習事例
    • https://speakerdeck.com/yasuhiro1711/chu-xin-zhe-gak8sdewpwoyun-yong-surumadefalsexue-xi-shi-li
  • 高レイテンシwebサーバのGKE構築と beta機能アレコレのハナシ
    • https://www.slideshare.net/junpayment/webgke-beta
  • Ansible、Terraform、Packerで作るSelf-Hosted Kubernetes
    • https://speakerdeck.com/takaishi/jkd1812
  • ABEJAの映像解析を支える仕組みとRancher
    • https://www.slideshare.net/xecus/abejarancher-japan-container-days-v1812
  • Rancher2.0で実現する Managed Kubernetes Service
    • https://www.slideshare.net/linecorp/rancher20-managed-kubernetes-service
  • オンプレだってここまでできる。Kubernetesで作る自前PaaS
    • https://speakerdeck.com/yuhara/managed-kubernetes-on-premises
  • Kubernetesが超強力な分散RDBに vitessの真価を大検証してみた
    • https://speakerdeck.com/cotoc/20181204-vitess-jkd-day1

5th

  • Cloud Native プロダクト 1000本ノック
    • https://speakerdeck.com/masayaaoyama/jkd1812-cloudnativemeetup
  • これからのクラウドネイティブアプリケーションの話をしよう
    • https://www.slideshare.net/YoshidaShingo/ss-125006886
  • 深層学習推論環境構築ハンズオン
    • https://speakerdeck.com/asashiho/japancontainerdays2018-workshop
  • Kubernetes上で動作する機械学習モジュールの配信&管理基盤Rekcurd について
    • https://www.slideshare.net/linecorp/kubernetesrekcurd
  • Dockerセキュリティ: 今すぐ役に立つテクニックから,次世代技術まで
    • https://www.slideshare.net/AkihiroSuda/docker-125002128
  • GitLabによるコンテナCI/CDパイプラインのこれから
    • https://www.slideshare.net/ShingoKitayama/gitlab-auto-devops-with-container-cicd
  • Jenkins x Kubernetesが簡単だと思ったら大変だった話
    • https://www.slideshare.net/YamamotoMasaki/jenkins-x-kubernetes/
  • runc だけじゃないコンテナ low level runtime 徹底比較
    • https://speakerdeck.com/makocchi/jkd-20181205-about-low-level-runtimes
  • Kubernetesと暮らすRancherな生活
    • https://www.slideshare.net/gchiba/kubernetesrancher-125017022
  • 改めてDockerfileのベストプラクティスを振り返ろう
    • https://www.slideshare.net/ssuser1f3c12/introduce-that-best-practices-for-writing-dockerfiles
  • GitOpsではじめるKubernetes CI/CD Pipeline
    • https://www.slideshare.net/linecorp/gitopskubernetes-cicd-pipeline
  • Pharosでk8s環境を楽して割り切って作る
    • https://speakerdeck.com/w4yh/jkd1812-2t2-pharos
  • 完全コンテナベースで運用する Rancher on オンプレの ゼロタッチプロビジョニング
    • https://www.slideshare.net/ssuseraac79b/rancher-on
  • とある30秒でできるKubernetes + GPU 開発環境
    • https://speakerdeck.com/xibuka/toaru30miao-dedekirukubernetes-plus-gpu-kai-fa-huan-jing
  • コンテナプラットフォームとしてのApache Mesos
    • https://speakerdeck.com/tsukaman/apache-mesos-is-he
  • Kubernetes Meetup Tokyo 2年間の振り返りと未来
    • https://speakerdeck.com/superbrothers/kubernetes-meetup-tokyo-looking-back-for-two-years-and-the-future
  • Runtime BoF 議事メモ (公開)
    • https://docs.google.com/document/d/14U_d5PLgcB25nja4Ox9VHF9AjuVWqxzWGso1xkcvg1Y/edit

おまけ:そのほかtwitterで呟かれていたリンクたち

  • https://www.sitespeed.io/
  • https://github.com/fluent/fluentd-kubernetes-daemonset
  • https://github.com/Rekcurd
  • https://github.com/weaveworks/flux
  • https://developer.ibm.com/jp/technologies/containers/
  • https://azure.microsoft.com/en-us/blog/bringing-serverless-to-azure-kubernetes-service/
  • https://github.com/containerdaysjp/showks-docs/blob/master/spinnaker/setup.md
  • https://github.com/containerdaysjp/showks-canvas-haruelico/pull/2
  • https://projectriff.io/
  • https://support.treasuredata.com/hc/en-us/articles/360001457427-Presto-Query-Engine
  • https://github.com/vitessio/vitess/blob/master/data/test/vtgate/unsupported_cases.txt
  • https://aws.amazon.com/jp/blogs/compute/introducing-aws-app-mesh-service-mesh-for-microservices-on-aws/
  • https://github.com/rancher/norman
  • https://www.creationline.com/kubernetes-training
  • https://github.com/operator-framework/operator-lifecycle-manager
  • https://github.com/kelseyhightower/kubernetes-the-hard-way
  • https://abejainc.com/ja/news/article/20181204-2352
  • https://itunes.apple.com/jp/podcast/fukabori-fm/id1388826609?mt=2&i=1000424961715
  • https://qiita.com/advent-calendar/2018/zlab
  • https://github.com/icholy/ttygif
  • https://github.com/mjording/ttyrec
  • https://github.com/databus23/helm-diff
  • https://k8s-docs-ja.connpass.com
  • https://github.com/everpeace/kube-throttler
  • https://github.com/mercari/certificate-expiry-monitor-controller
  • https://github.com/kubeedge/kubeedge
  • https://github.com/virtual-kubelet/virtual-kubelet

MetalLBでtype: LoadBalancerを使う

Kubernetesの説明を見るとtype: LoadBalancerのServiceばかり、NodePortにしてるけどなんか寂しい。そんなときRaspberry Piにインストール手順を調べていたら外部LBがなくてもtype: LoadBalancerが使えるようになるMetalLBを知りました。さっそくRaspberry Piにkubernetesクラスタをインストールするでインストールしたkubernetesに入れました。

インストールはapplyするだけ。

$ kubectl apply -f https://raw.githubusercontent.com/google/metallb/v0.7.3/manifests/metallb.yaml

インストールするとmetallb-system namespaceにいろいろできる。

$ kubectl get all -n metallb-system -o wide
NAME                            READY     STATUS    RESTARTS   AGE       IP           NODE      NOMINATED NODE
pod/controller-9c57dbd4-tnfrc   1/1       Running   0          14m       10.244.2.6   berry-3   <none>
pod/speaker-7wh84               1/1       Running   0          14m       10.0.0.53    berry-3   <none>
pod/speaker-xzbh7               1/1       Running   0          14m       10.0.0.52    berry-2   <none>

NAME                     DESIRED   CURRENT   READY     UP-TO-DATE   AVAILABLE   NODE SELECTOR   AGE       CONTAINERS   IMAGES                   SELECTOR
daemonset.apps/speaker   2         2         2         2            2           <none>          14m       speaker      metallb/speaker:v0.7.3   app=metallb,component=speaker

NAME                         DESIRED   CURRENT   UP-TO-DATE   AVAILABLE   AGE       CONTAINERS   IMAGES                      SELECTOR
deployment.apps/controller   1         1         1            1           14m       controller   metallb/controller:v0.7.3   app=metallb,component=controller

NAME                                  DESIRED   CURRENT   READY     AGE       CONTAINERS   IMAGES                      SELECTOR
replicaset.apps/controller-9c57dbd4   1         1         1         14m       controller   metallb/controller:v0.7.3   app=metallb,component=controller,pod-template-hash=57138680

以下でConfigMapを作成して設定を入れます。protocolはlayer2とbgpとがありますが、BGPをはなすルーターは持ってないので今回はlayer2。

$ cat l2-config.yaml
apiVersion: v1
kind: ConfigMap
metadata:
  namespace: metallb-system
  name: config
data:
  config: |
    address-pools:
    - name: default
      protocol: layer2
      addresses:
      - 10.0.0.151-10.0.0.200
$ kubectl apply -f l2-config.yaml

それではtype: LoadBalancerのServiceとDeploymentを作成しましょう。

$ cat armhf-lb.yaml
apiVersion: v1
kind: Service
metadata:
  name: my-hypriot-svc
  labels:
    app: hypriot
spec:
  type: LoadBalancer
  ports:
  - name: http
    port: 80
    protocol: TCP
    targetPort: 80
  selector:
    app: hypriot
---
apiVersion: apps/v1
kind: Deployment
metadata:
  name: my-hypriot-deploy
  labels:
    app: hypriot
spec:
  replicas: 2
  selector:
    matchLabels:
      app: hypriot
  template:
    metadata:
      labels:
        app: hypriot
    spec:
      containers:
      - name: hypriot 
        image: hypriot/rpi-busybox-httpd
        ports:
        - containerPort: 80
$ kubectl apply -f armhf-lb.yaml

ServiceにEXTERNAL-IPが付与されたのを確かめます。

$ kubectl get svc my-hypriot-svc -o wide
NAME             TYPE           CLUSTER-IP      EXTERNAL-IP   PORT(S)        AGE       SELECTOR
my-hypriot-svc   LoadBalancer   10.102.222.71   10.0.0.151    80:31981/TCP   18s       app=hypriot

しばらくしてhttp://10.0.0.151 を開くと本当に表示されました。

Raspberry Piにkubernetesクラスタをインストールする

8月末に何気なくテレビを見ていたら夏休みの自由研究について話していたので自分も何かしたくなり、3台のRaspbrerry Pi 3 B+にkubeadmを使ってkubernetesクラスタシングル構成をインストールしてみました。

購入したハードウェア

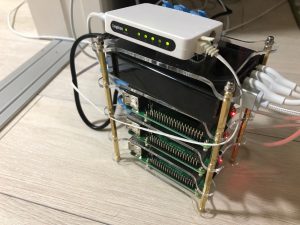
kubernetesのラズパイ包みが美味しそうだったので、kubeadmを使って作ってみたを参考にし、Raspberry PiはRSコンポーネンツから、Raspberry Pi以外はAmazonで購入しました。Raspberry Piを入れるタワー状のケースもちゃんとAmazonで売っていました。

  • Raspberry Pi 3 Model B+ [137-3331] * 3
  • Samsung microSD card 32GB(B06XSV23T1) * 3
  • Micro USB cable Syncwire UNBREAKcable 20cm(B073WT6VJ5) * 3
  • UGREEN Micro USB cable 0.5m(B06VV6Z3L7)
  • LAN cable 0.3m(B00JEUSAR2) * 3
  • 6 port USB charger(B00QUS6AY6)
  • Switching hub 5 port(B00D5Q7V1M)
  • Raspberry Pi case(B01F8AHNBA)

ソフトウェア

    • 2018-06-27-raspbian-stretch-lite.img
    • Kubeadm
$ kubeadm version
kubeadm version: &amp;version.Info{Major:"1", Minor:"11", GitVersion:"v1.11.3", GitCommit:"a4529464e4629c21224b3d52edfe0ea91b072862", GitTreeState:"clean", BuildDate:"2018-09-09T17:59:42Z", GoVersion:"go1.10.3", Compiler:"gc", Platform:"linux/arm"}
$ sudo dpkg -l |grep kube
ii kubeadm 1.11.3-00 armhf Kubernetes Cluster Bootstrapping Tool
ii kubectl 1.11.3-00 armhf Kubernetes Command Line Tool
ii kubelet 1.11.3-00 armhf Kubernetes Node Agent
ii kubernetes-cni 0.6.0-00 armhf Kubernetes CNI
    • Docker
$ sudo dpkg -l |grep docker-ce
ii docker-ce 18.06.1~ce~3-0~raspbian armhf Docker: the open-source application container engine
    • Flannel
$ kubectl describe ds kube-flannel-ds-arm -n kube-system | grep Image
Image: quay.io/coreos/flannel:v0.10.0-arm

インストール手順

3台すべてで行うもの、Master nodeで行うもの、Worker node(2台) で行うものからなります。以下の設定で実行したので適宜置き換えてください。

ノード IPアドレス ホスト名
Master node 10.0.0.51 berry-1
Worker node1台目 10.0.0.52 berry-2
Worker node2台目 10.0.0.53 berry-3

3台すべてで行うもの

Raspberry PiのOSを手持ちのMacBookでSDカードに書き込みます。Raspbian stretch lite をhttps://www.raspberrypi.org/downloads/raspbian/からダウンロードします。以下を実行します。

$ cd ~/Download
$ unzip 2017-09-07-raspbian-stretch-lite.zip
$ sudo diskutil umount /dev/disk2s1
$ sudo dd bs=1m if=2018-06-27-raspbian-stretch-lite.img of=/dev/rdisk2 conv=sync
$ sudo diskutil umountDisk /dev/disk2

sshを有効にします。

  $ cd /Volumes/boot
  $ touch ssh

SDカードをMacBookからとり、Raspberry Piに挿入し、電源のUSBケーブルを挿します。ログインプロンプトが出たら、pi/raspberryでログインします。raspi-configコマンドを実行し、キーボード設定とホスト名を変更します。
次に、/etc/dhcpcd.confに以下を追加し、IPアドレスを変更します。ip_addressの値はそれぞれの値とします。

  interface eth0
  static ip_address=10.0.0.53/24
  static routers=10.0.0.1
  static domain_name_servers=10.0.0.1

Dockerをインストールします。

$ curl -sSL get.docker.com | sh && \
sudo usermod pi -aG docker
newgrp docker

SWAPを無効にします。

$ sudo dphys-swapfile swapoff && \
sudo dphys-swapfile uninstall && \
sudo update-rc.d dphys-swapfile remove

/boot/cmdline.txtにあるテキストの最後に、スペースを空けて以下を追加します。

cgroup_enable=cpuset cgroup_enable=memory

一旦リブートします。
kubeadmをインストールします。

$ curl -s https://packages.cloud.google.com/apt/doc/apt-key.gpg | sudo apt-key add - && \
  echo "deb http://apt.kubernetes.io/ kubernetes-xenial main" | sudo tee /etc/apt/sources.list.d/kubernetes.list && \
  sudo apt-get update -q && \
  sudo apt-get install -qy kubeadm

Master node(1台)で実行する

下記のコマンドを実行し、Master nodeを初期化します。

$ sudo kubeadm init --token-ttl=0 --pod-network-cidr=10.244.0.0/16

初期化が終了したら、表示されたように以下を実行します。

mkdir -p $HOME/.kube
sudo cp -i /etc/kubernetes/admin.conf $HOME/.kube/config
sudo chown $(id -u):$(id -g) $HOME/.kube/config

初期化が終了したら、kubeadm join で始まるコマンドが表示されているのでそれを適当な場所に保存しておきます。

Flannel setup

Flannelをインストールしてカーネルを初期化します。

$ kubectl apply -f https://raw.githubusercontent.com/coreos/flannel/master/Documentation/kube-flannel.yml
$ sudo sysctl net.bridge.bridge-nf-call-iptables=1

STATUSがRunningになっていることを確認します。

$ kubectl get po -n kube-system
NAME                              READY     STATUS    RESTARTS   AGE
coredns-78fcdf6894-shcnd          1/1       Running   1          2d
coredns-78fcdf6894-vzrp9          1/1       Running   1          2d
etcd-berry-1                      1/1       Running   1          2d
kube-apiserver-berry-1            1/1       Running   1          2d
kube-controller-manager-berry-1   1/1       Running   1          2d
kube-flannel-ds-arm-k7psp         1/1       Running   2          1d
kube-proxy-x58xl                  1/1       Running   1          2d
kube-scheduler-berry-1            1/1       Running   1          2d

Worker node(2台)で実行する

カーネルパラメータを変更します。

$ sudo sysctl net.bridge.bridge-nf-call-iptables=1

クラスタに参加します。Master nodeを初期化した時に表示されたコマンドを実行します。

  $ sudo kubeadm join 10.0.0.51:6443 --token wxxo84.rmbxfo2gprs91li7 --discovery-token-ca-cert-hash sha256:d76dede60db0a973b43628d59b82a139f5978469f5f2b743c419628a45fc1cc8

Master nodeから参加したノードで動作するpodのSTATUSがRunningであることを確認します。

   $ kubectl get po -n kube-system -o wide |grep berry-2
   kube-flannel-ds-arm-gq8bs         1/1       Running   2          9h        10.0.0.52     berry-2   <none>
   kube-proxy-zx4qq                  1/1       Running   0          9h        10.0.0.52     berry-2   <none>

動作確認

hello-worldを起動してもpodがCrashLoopBackOffになってしまったので、代わりに以下の方法で確認します。まず下記を実行します。

$ kubectl run hypriot --image=hypriot/rpi-busybox-httpd --replicas=3 --port=80
$ kubectl expose deployment hypriot --port 80 --target-port 80 --type NodePort
$ kubectl get svc hypriot

実行後、http://10.0.0.52:をブラウザから開きます。

参考

  • https://gist.github.com/alexellis/fdbc90de7691a1b9edb545c17da2d975
  • https://qiita.com/hatotaka/items/48a88ecb190e1f5e03c3
  • https://blog.hypriot.com/post/setup-kubernetes-raspberry-pi-cluster/


Cloud Foundry Container Runtime でk8s on OpenStack

Kubernetes Meetup Tokyo #8でCloud Foundry Container Runtime(CFCR)を使ってOpenStack Pikeにk8sをインストールできると聞いてインストールしてみました。OpenStackはもう何年も触っているし、BOSHは3年前に触ったことあるし、と始めましたがドキュメント通りコピペすればいい、というわけではないのでなかなか大変でした。

OpenStack環境

https://docs.openstack.org/install-guide/openstack-services.html#minimal-deployment のminimal deployment に加えてcinder も必要なのでインストールしました。この手順ではhostsファイルで名前解決していますが、後々BOSHで起動したVMが名前解決できる必要があるのでendpointはIPアドレスで再登録しておきました。

CFCR用プロジェクト、ユーザー、鍵、仮想ネットワーク、サブネット、セキュリティグループを作成します。自分は以下のように作りました。

  • プロジェクト名:k8s
  • ユーザー k8s
  • 仮想ネットワーク selfservice
  • サブネット selfservice, 172.16.1.0/24
  • 鍵 mykey
  • セキュリティグループ k8s

セキュリティグループのルールはCFCRの前提としてBOSHが使える必要があるため、8. Add the following rules to the BOSH Security Group: かつ 5. A network configured to allow the following: をとります。

以下はセキュリティグループルールの例。試行錯誤していたので正しくないかもしれませんが。。

$ openstack security group rule list k8s 
+--------------------------------------+-------------+-----------+-------------+--------------------------------------+
| ID                                   | IP Protocol | IP Range  | Port Range  | Remote Security Group                |
+--------------------------------------+-------------+-----------+-------------+--------------------------------------+ | 09268ad6-16e0-4679-b788-97ecca778679 | udp         | None      | 8285:8285   | 99d8ce43-f500-47ec-9cce-dd4b32f6ae76 |
| 1bf09b03-bfed-4bbf-a489-70babbbb44ec | None        | None      |             | None                                 |
| 2199df36-f76f-4946-8a81-d05cd20e8622 | tcp         | 0.0.0.0/0 | 30000:32765 | None                                 |
| 2f4a30e4-2038-4883-915f-3b63322ad040 | tcp         | 0.0.0.0/0 | 8443:8443   | None                                 |
| 54357d8f-88ea-4492-a183-1c53509aa70b | tcp         | None      | 1:65535     | 99d8ce43-f500-47ec-9cce-dd4b32f6ae76 |
| 9eca2f5e-6ae7-4d79-9d4b-93fd2b002596 | tcp         | 0.0.0.0/0 | 6868:6868   | None                                 | | b5f84e30-338c-42eb-a066-8ef808345d60 | tcp         | 0.0.0.0/0 | 25555:25555 | None                                 |
| e7655700-801b-477c-b2b7-af6fe5937afc | None        | None      |             | None                                 | | ebfc7a77-f808-4216-9f7f-297eb9efcaba | tcp         | None      | 53:53       | 99d8ce43-f500-47ec-9cce-dd4b32f6ae76 |
+--------------------------------------+-------------+-----------+-------------+--------------------------------------+

また、CFCR用フレーバーm1.large、m1.xlargeを作成します。名前が合っている必要があります。以下は作成後をリストした例。

$ nova flavor-list
+----+-----------+-----------+------+-----------+------+-------+-------------+-----------+
| ID | Name      | Memory_MB | Disk | Ephemeral | Swap | VCPUs | RXTX_Factor | Is_Public |
+----+-----------+-----------+------+-----------+------+-------+-------------+-----------+
| 0  | m1.nano   | 64        | 1    | 0         |      | 1     | 1.0         | True      |
| 1  | m1.small  | 2048      | 10   | 0         |      | 1     | 1.0         | True      |
| 2  | m1.xlarge | 8192      | 20   | 0         |      | 4     | 1.0         | True      |
| 3  | m1.large  | 4096      | 20   | 0         |      | 2     | 1.0         | True      |
+----+-----------+-----------+------+-----------+------+-------+-------------+-----------+

Bastion VM作成

OpenStack でBOSHを使うときは踏み台としてVMを作成(Bastion VMという)してそこから操作するのが常道のようです。ここでもそれに習い作成します。上記で作成したユーザーで、作成した鍵、仮想ネットワーク、サブネットを指定します。イメージはubuntu xenialにしました。フレーバーはm1.small(メモリ2048、ディスク10GB)。

Bastion VMに入り、BOSH CLI v2とcredhub-cliをインストールします。credhub-cliはドキュメントにはありませんが後々インストールが必要になります。BOSH CLI v2のインストール手順はhttps://bosh.io/docs/cli-v2.html#installにあります。Goで書かれているので実行ファイルをダウンロード、実行権を付与しパスがあるディレクトリに置きます。このとき、ファイル名をboshではなくbosh-cliにします。なぜか、CFCRのシェルスクリプトではbosh-cliとなっているためです。その後書いてある通りに(Trustyではありませんが気にせず)OS依存パッケージをインストールします。credhub-cliはhttps://github.com/cloudfoundry-incubator/credhub-cli/releasesからダウンロードして解凍し実行権を付与し、パスがあるディレクトリに移動します。

以上でOpenStack環境と作業するVMの準備ができました。

BOSHのデプロイ

https://docs-cfcr.cfapps.io/installing/openstack/deploying-bosh-openstack/ の手順です。

設定ファイル生成

Step 1: Generate a Configuration Templateに書いてある通りにBastion VMに入って実行します。実行すると/home/ubuntu/kubo-env/kubo下にdirector.yml、director-secrets.ymlができます。

ロードバランサ作成

Step 2: Configure Routingに相当する手順です。ここはよくわからず合っているかわかりませんが、とりあえず動作したということで記録します。OpenStackではロードバランササービスが一般的ではないので、VMにHAProxyをインストールしてそれをロードバランサに使います。と言ってもFloatingIPにアクセスしたらkubernetesのマスターノードにある apiserverに通すだけ。。この次で設定ファイルにFloating IPを書くこともあり、この段階でFloating IPも付与して稼働させておきます。HAProxyパッケージをインストールした後にHAProxyの設定ファイル/etc/haproxy/haproxy/haproxy.cfgに以下を追加しました。

frontend web_proxy
        default_backend kubeapi
        bind *:8443
        mode tcp

backend kubeapi
        mode tcp
        server kubeapi 172.16.1.9:8443

172.16.1.9 はkubernetesのマスターノードのIPアドレスです。実はこれはデプロイしてみないとわからないので今は適当。

BOSH directorデプロイ

BOSH directorを構築するステップです。終わるとbosh/0という名前のVMが作成されます。

まず、/home/ubuntu/kubo-env/kubo/director.ymlを編集します。以下が例です。

internal_ip: 172.16.1.20 # Internal ip address of the BOSH director. Please select an available ip address in the network you wish to deploy into.

internal_cidr: 172.16.1.0/24 # CIDR range that BOSH will deploy to
internal_gw: 172.16.1.1 # internal gateway

director_name: k8director # user friendly Director name
dns_recursor_ip: 10.0.0.1 # DNS IP address for resolving non-BOSH hostnames

kubo_release_url: https://storage.googleapis.com/kubo-public/kubo-release-latest.tgz

worker_count: 3

# IaaS routing mode settings
# Comment this section when using CF routing mode
routing_mode: iaas
kubernetes_master_host: 10.0.0.202 # IP address that can be used to reach the Kubernetes API, usually the address of a load balancer or static IP
master_target_pool: # target pool that master nodes will be a part of

authorization_mode: abac # RBAC or ABAC authorization modes for the K8s cluster. Note: RBAC is not stable as of 0.8.x.

auth_url: 'http://10.0.0.11:5000/v3' # OpenStack authentication URL
az: nova # Availability zone
default_key_name: mykey # Name of the SSH key pair
default_security_groups:
# List of security groups for the instances
  - k8s
  - default
net_id: 57452a08-e50a-40a6-a25a-cb72e8b44ac5  # OpenStack network identifier
openstack_domain: default # OpenStack domain (optional)
openstack_project: k8s # Openstack project name
openstack_tenant: k8s # OpenStack tenant (required for multi-tenant environments)
region: RegionOne # OpenStack region (optional)
openstack_username: k8s # OpenStack admin username

internal_ipはBOSH directorのIPアドレスです。まだ使われていないサブネットのIPアドレスを指定します。internal_cidrは作成したサブネットのアドレス範囲です。internal_gwは作成したサブネットのゲートウェイです。dns_recursor_ipはDNSサーバのIPアドレスです。kubernetes_master_hostはHAProxyのVMにつけたFloatingIPです。

default_key_nameに指定したキーペアの秘密鍵を適当な場所に置きます。自分は/home/ubuntu/kubo-deployment下に置きました。

次に/home/ubuntu/kubo-env/kubo/director-secretes.ymlを編集します。openstack_passwordの値にadminのパスワードを書き込みます。

準備ができたので、kubo-deployment下から以下を実行します。

$ ./bin/deploy_bosh "${kubo_env_path}" id_rsa

しばらく待つとbosh/0というVMが作成されて終了します。

CFCRデプロイ

ここまで来ればあともう少しです。ここからが本番CFCRデプロイだろ、と思いますが本当です。これが良くも悪くもBOSHというもの。

私の環境はOpenStackかつノープロキシなので、Step 3: Deploy CFCRから始まります。以下を実行します。

$ ./bin/deploy_k8s ~/kubo-env/kubo my-cluster

成功すると、VMが4つできました。マスターノード1つとワーカーノード3つのようです。名前がmasterで始まっているVMのIPアドレスをひかえます。haproxy.cfgに適当に設定したIPをこのアドレスに変更し、HAProxyサービスを再起動します。はい終了。

Kubernetesクラスターにアクセス

Step 4: Access Kubernetesの手順です。用意されているシェルを実行してconfigを生成してapiserverにアクセスします。

以下を実行します。これで~/.kube が作成されます、たぶん。

./bin/set_kubeconfig ~/kubo-env/kubo my-cluster

以下を実行し動作確認します。

$ kubectl get pods --namespace=kube-system

以下のように出力されました。

ubuntu@bastion3:~$ kubectl get pods --namespace=kube-system
NAME                                    READY     STATUS    RESTARTS   AGE
heapster-5cd77b4fcb-gfcth               1/1       Running   0          6d
kube-dns-7468555786-qm47z               3/3       Running   0          6d
kubernetes-dashboard-85f6fc6c95-b74hv   1/1       Running   0          6d
monitoring-influxdb-679d8fc75c-lr5fs    1/1       Running   0          6d

めでたく終了。

keystone をリモートデバッグする

EclipseのPydevプラグインを使い、Keystoneをリモートデバッグできたので、記録を残します。Eclipseは以前Javaによる開発で使っていたので、Eclipseについては飛ばします。

環境

  • Ubuntu Desktop 14.04.3
  • Eclipse Mars (4.5)
  • Keystone Liberty 開発サイクル

Eclipseインストール

EclipseはJava 開発者向けなどインストールに際するの選択肢が多いですが、 Eclipse Platform でよいです。Eclipseインストール後、Egit plugin、Pydev plugin をインストールします。

Keystone プロジェクト作成

Egit にて、Keystone を clone します。cloneした プロジェクトの Working directory を右クリックして Import Projects… をクリックし Import as general project を選択し、とりあえずインポートします。インポートできたらプロジェクトを右クリックし、Pydev から Set as Pydev Project を選択します。Python not configured が出た場合は、一番左にある Quick Auto-Config をクリックします。

python_not_configured

Python package インストール

python-six アンインストール

debパッケージの six ではのちにエラーになるため、python-six パッケージを削除します。

$ sudo apt-get autoremove python-six

pip インストール

debパッケージでなく、最新の pip をインストールしないとのちにエラーになるため、最新の pip をインストールします。https://pip.pypa.io/en/stable/installing/から get-pip.py をダウンロードしてインストールします。

keystone の依存パッケージインストール

git がないとのちにエラーになるため、git をインストールします。

$ sudo apt-get install git

Keystone の開発ドキュメントに従い、以下を実行します。

$ sudo apt-get install python-dev python3-dev libxml2-dev libxslt1-dev libsasl2-dev libsqlite3-dev libssl-dev libldap2-dev libffi-dev
$ sudo pip installl -r requirements.txt
$ sudo pip installl -r test-requirements.txt
$ sudo pip setup.py develop

keystone 設定ファイルコピー

Keystone の開発ドキュメントに従い、以下を実行します。

$ cp etc/keystone.conf.sample etc/keystone.conf

Eclipse設定

pysrc を PYTHONPATH にいれる

デバッグに必要な pydevd を python のパスに含めるため、pysrc を PYTHONPATH に含めます。pysrc の場所は以下コマンドで探します。

$ find ~/ -name 'org.python.pydev_*'

たとえば ./.p2/pool/plugins/org.python.pydev_4.3.0.201508182223 のようなものです。

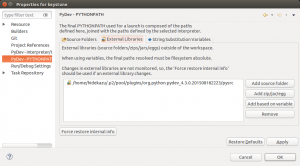
実際にPYTHONPATHに含めるには、プロジェクトを右クリックしてPropertiesを選択。Pydev – PYTHONPATH をクリックし、External Libraries タブをクリックします。。Add source folder をクリックし、pysrc を選び、OK をクリックします。pysrc が . から始まるフォルダにある場合は、ホームディレクトリをクリック後、左上にある鉛筆アイコンをクリックし、直に入力する必要があります。

PYTHONPATH

起動設定

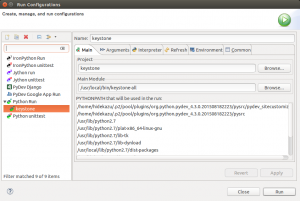
プロジェクト – cmd – all.py を右クリックし、Run As – Run Configurations… を選択します。Name: を適切な名称に変更し、Main タブで Main Moduleに /usr/local/bin/keystone-all を入力し、Apply をクリックします。
Run Configurations - Main

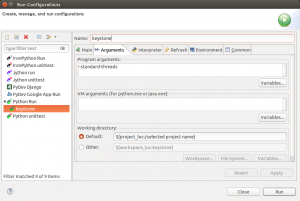
Arguments タブをクリックし、Program arguments: に –standard-threads と入力し、Apply をクリックし OK をクリックします。
Run Configurations - Arguments

設定

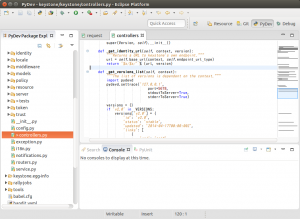
デバッグが始まるように、keystone/controllers.pyのdef _get_versions_list(self, context):の下に以下のコードを入れます。

import pydevd
pydevd.settrace('127.0.0.1', port=5678, stdoutToServer=True, stderrToServer=True)

pydevd

デバッグサーバ起動

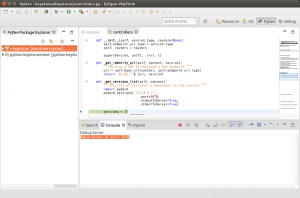
Debug Perspective に移動し、メニューからPydev – Start Debug Server をクリックします。左下の Console で Debug Server at port: 5678 と表示されたことを確認します。

Keystone 起動

Pydev Perspective に移動し、メニューから Run – Run Configurations を選択し、右下のRun をクリックします。Console に Started child が4行表示されたことを確認します。

デバッグ実行

ターミナルから以下を実行します。

$ curl http://127.0.0.1:35357/v3

戻り値がなく、Eclipse の画面を見ると、def _get_versions_list(self, context): の下に入れたコードのしたで止まっている(左側に右矢印が表示されてる)ことを確認します。
debug

あとは、Debug Perspective に移動し、ステップ実行などができます。

BOSH LiteでCloud Foundryをインストールする(3)

BOSH LiteはVagrnat boxにWardenコンテナを使ったBOSHのローカル開発環境です。BOSH Liteを使って、Vagrant boxにCloud Foundry実行環境を構築できます。手元のMacBook AirにBOSH Liteを使い、Cloud Foundryを構築します。これはBOSH LiteでCloud Foundryをインストールする(2)の続きです。

BOSH Liteを使いデプロイしたCloud Foundryを設定し、アプリケーションをアップロードします。

準備
Goインストール

Cloud Foundry CLIがGoでできているため、まずはGoをインストールします。http://golang.org/からGoのディストリビューションをダウンロードし、インストールします。最新は1.3でしたが、念のため1.2をインストールしました。

$ go version
$ go version go1.2 darwin/amd64

Go環境を設定します。

$ mkdir -p ~/go
$ export GOPATH=~/go

Cloud Foundry CLIインストール

http://github.com/cloudfoundry/cli
のDownloads下にある、Stable InstallersのMac OS X 64 bitをクリックして、ダウンロードし、インストールします。

以上で準備が終わりました。

Cloud Foundry設定

Cloud Foundryを設定します。

$ cf api --skip-ssl-validation https://api.10.244.0.34.xip.io
$ cf auth admin admin
$ cf create-org me
$ cf target -o me
$ cf create-space development
$ cf target -s development

アプリケーションのアップロード

cf-acceptance-testsにサンプルアプリケーションhello-worldが含まれているので、それをアップロードすることにします。アップロードするアプリケーションを取得します。

$ go get github.com/cloudfoundry/cf-acceptance-tests
$ cd $GOPATH/src/github.com/cloudfoundry/cf-acceptance-tests

.godirファイルがないとアップロードに失敗するため、空ファイルを作成します。

$ cd assets/hello-world
$ touch .godir

アップロードします。

$ cf push hello-world

hello-worldが返ってくることを確認します。

$ curl hello-world.10.244.0.34.xip.io
hello, world!

以上で、BOSH Liteをインストールし、Cloud Foundryをデプロイ、アプリケーションをアップロードできました。